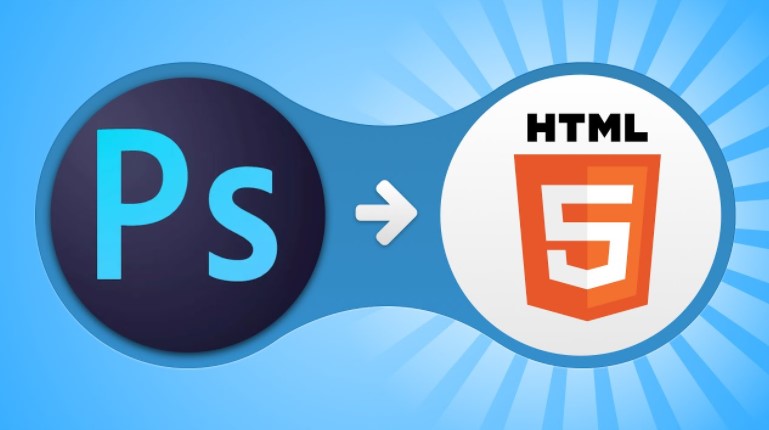

So, you have a killer PSD that you want to convert into a killer WordPress theme, but you’re stuck. Perhaps you’ve heard that WordPress is easy to use, but it’s just a little too complicated for your taste. Maybe you’ve had a friend who tried to build a WordPress theme and they hit a wall. So, you’ve looked around online for a tutorial that will help you through the entire process, but you haven’t found anything. You’ve done a lot of research, but you’re still confused about how to get started. You’re not alone.
Coding and design don’t have to be at odds with each other. In fact, in this post we’re going to show you how to turn your PSD design into a WordPress theme that is just as good as the original. WordPress is a powerful platform, but it’s also easy to use. If you’ve ever used WordPress before, you know how to use it to build a site. If you’re a newbie, it’s not that tough to learn, either. Here are some basics to get you started.
The quick and easy way to convert a PSD design into a WordPress theme
Designing a brand new WordPress theme from scratch is a lot of hard work. But if you’re in a pinch, you can save yourself some serious time by building your new WordPress theme out of an existing PSD design. All you need are a few little tips and tricks to make sure you don’t lose any important parts of the design or functionality. Once you’re done, you can put your newfound knowledge to the test by building your next wp theme with ease.
Tired of spending hours and hours trying to convert a PSD design into a WordPress theme? Well, there’s an easy way to do it. Sure, you could just go to a web designer and ask them to convert it for you for $99 an hour, but why spend all that money when you can do it yourself in a matter of minutes for free? It’s just like coding your own WordPress theme. The hard part will be figuring out how to do it, but once you do, you’ll be able to convert any design to WordPress in no time.
1. Add a Header
When you’re building a new website, there are a few choices you need to make: what color scheme will you use, how will you organize your content, and is there some way to make your site look unique? The latter is where headers come in. They may seem like a small detail, but they can really make a site stand out from all the others. So, how do you select a header that will be a perfect complement to your site’s design?
The header is the page in a word processing document, book, manuscript, or other written material, that includes the title or main heading. It is usually the top part of the page, and may be followed by a page number and a running footer. In book publishing, the header is the page number, title, and running footer for a page. The header is not the same as the running head, which generally refers to the page number of the current page, rather than the title of the work.
2. Add Columns
One of the most important things a web developer can learn is how to use CSS to control the layout of a page. The simplest way to do this is to use the “float” and “clear” attributes. What are floats and clears? Floats are a way to display images with text. Clears are a way to move text away from a floated image.
Adding three columns to your webpage is super easy with a little help from CSS. To do it, you’ll need the following items: Column 1 – the content you want in the first column. Column 2 – the content you want in the second column. Column 3 – the content you want in the third column.
One of the exciting things about web design is how easy it is to modify existing code to create brand new designs. There are many ways to accomplish this, but the following article is going to discuss some of the best methods for achieving this.
3. Add Navigation
Navigating to a page within a site or app can be done many ways, but what if you wanted to add a navigation menu to your site or app? The best way to do that is to create a navigation bar to help users find their way around your site or app. There are a number of ways to do this, the simplest being just using HTML, CSS and JavaScript. However, a navigation bar doesn’t always have to be that complicated.
4. Add a Footer
Adding a footer to your blog can be a great way to add additional content to your site. Bloggers use footers to display a series of links or widgets, or to include copyright information or terms of service. To add a footer, you’ll need to modify your theme’s code, so you’ll need to be comfortable working with the backend of your blog. While the process is a bit more complicated than adding a widget, it’s not too difficult.
“Add a Footer” is a free WordPress plugin that makes it easy to add a footer to your website, while still being beautiful and adaptable to any theme. It’s very easy to use, and it makes the perfect footer for your site.
5. Create a responsive HTML5 base page
In this blogpost you will learn how to create a simple and responsive HTML5 base page, including a responsive grid system, fluid images, and media queries. Since we are going to create this page from scratch, you will also learn how to work with typography, navigation, menus, and images.
HTML5 is here, just waiting for you to jump on board. It has all the bells and whistles of Flash, but none of the baggage that comes with it. Take for example the new HTML5 video element, it is an open standard that will provide perfect playback across every device and browser.The HTML5 video element has several values to set. In the following example we will set the element to autoplay, loop, and play Online.
6. Include a theme framework
It can be tempting to simply start hacking away at a theme, but you will save yourself a lot of time if you first spend some time planning your site. A solid design starts with a solid plan, and this planning process goes beyond simply coming up with a few catchy words to describe your site.
At the end of the day, one of the hardest parts of creating a theme is making sure that it works as advertised. That’s why we’ve created Theme Framework, the easiest way to give every site you build a consistent design, look and feel. By automatically adding in all the the right filters, classes, menus and widgets, Theme Framework helps you create the perfect theme, without the need to worry about individual elements.
7. Include all your HTML components
HTML components are the building blocks of a web page. (HTML components are the building blocks of a web page.) They can be text, images, videos, tables or forms. (They can be text, images, videos, tables or forms.) By using these (HTML components you can build web pages.)
8. Include your JS components
Javascript components have recently become a new way of writing modular javascript. Component-based architectures are all the rage, and for good reason: they make it easier to manage code, because components can be encapsulated and then reused in other applications. This new trend has been dubbed “The Year of the Javascript Component”. So, what are components? And how can you make your own? Most tutorials will tell you that you can write your components in vanilla javascript, and then compile them using a tool like Browserify or Webpack, which combine all of your individual components into one file. Here are the steps:
9. Add in the width
The width of the box is the total width of the contents, including the padding, margins, borders, and overflow. The width is used to set the width of elements inside the box, including images, tables, and other block elements that have widths. The width property can also be used to set the width of an entire box, including the border.
10. Add in the padding
First, you need to start with two key elements to add in the padding, which will also help you to add in the padding to other elements. Start with the padding (obviously) and then add in the padding. For this example, I’ll use a padding of 1.5 inches and a width of 4 inches.
Add in the padding is a blog about the hobby of tabletop role-playing games. The blog’s owner, Bob, has been playing tabletop role-playing games for a long time, and he has a lot of experience to draw from. He seeks to write about tabletop role-playing games, so that his readers may glean insight into the hobby and maybe even try it out themselves.

Usman is a CEO and the co-founder of Faith-Based Advertising Company and a content marketing specialist at Photoshop to WP Conversion Service, Minnesota Criminal Defense Lawyer Lynne Torgerson, Alabaster Grace Ministries, and The Glory Candle. He is devoted to helping small businesses bridge success gaps by providing in-depth, actionable advice on digital marketing, SEO, and small business growth.