Are you tired of the embarrassment caused by typos and grammatical errors in your emails? I got your back. Some years back, I had the same issue. I used to write emails on Outlook and trust me I always thought that this particular email could be written in a better way. Later, I came to know about Grammarly and it has been life-changing.
I added Grammarly to Outlook, and since then, I have never looked back. Adding Grammarly to Microsoft Outlook can be a game-changer in improving your email communication. Grammarly is a worldwide digital writing assistant for the English language. It not only spots spelling and grammar mistakes but also provides suggestions to improve the clarity, engagement, and delivery of your messages.
Grammarly is also capable of detecting plagiarized content which makes it an indispensable tool for writers, researchers, students, and Certified Kubernetes Administrator. The below guide will walk you through the easy steps of adding Grammarly to your Outlook. It ensures that you craft impactful and error-free emails with ease. So, without wasting any more time, let’s dive into the steps to add Grammarly to Outlook.
Download Grammarly for Your Computer
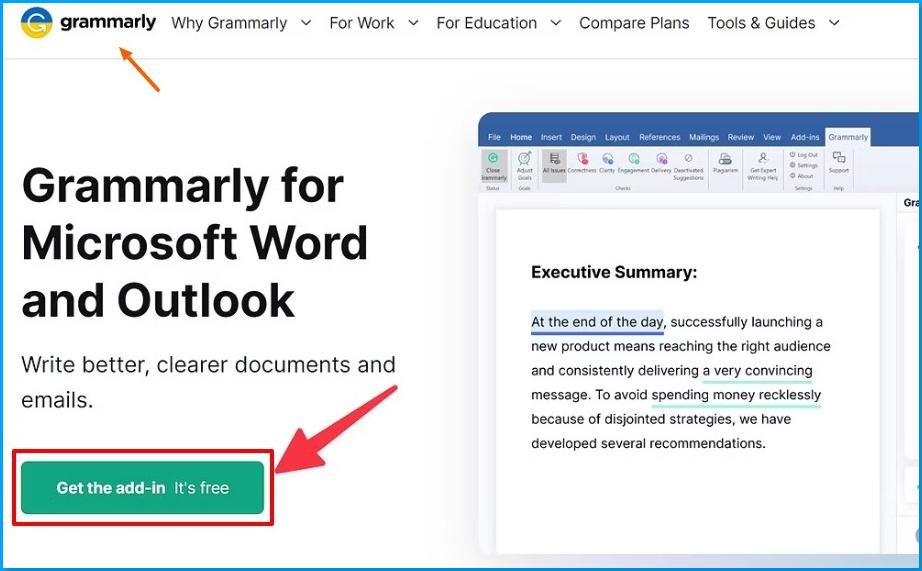
Let me provide you with simple steps to download Grammarly for your computer. Follow the below steps:
1. Open Grammarly Web App:
Start by visiting Grammarly’s website and log in using your credentials. You can sign up for a new account if you do not have one already.
2. Find the App Section:
Look for the “app” section in the toolbar on the left side of the Grammarly web page.
3. Choose Your Operating System:
Now, two options will appear in front of you. Click on Grammarly for Windows or Grammarly for Mac computer depending on the device that you own. You can download the Grammarly app for that operating system.
4. Download and Install:
Click on the download link provided for your operating system (Windows or Mac). The next step is to follow the on-screen instructions and the installation process.
5. Log In:
Wait for the installation to finish and then open the app and log in using your Grammarly account credentials.
Now, in just five easy steps, you can start using the Grammarly app on your computer, and can be used across all your writing applications. It’s the easiest way to use Grammarly within Outlook.
Install Grammarly for Microsoft Outlook
Here is how you can simply install Grammarly for Microsoft Outlook:
1. Go to the Grammarly website:
First thing first, you need to open a web browser on your computer and visit the Grammarly website.
2. Download Grammarly:
Look for the Add-in of Grammarly and download it on your computer.
3. Open the downloaded file:
Navigate to the Downloads Folder of the web browser and then click on the downloaded file of Grammarly add-in and open it.
4. Start the setup:
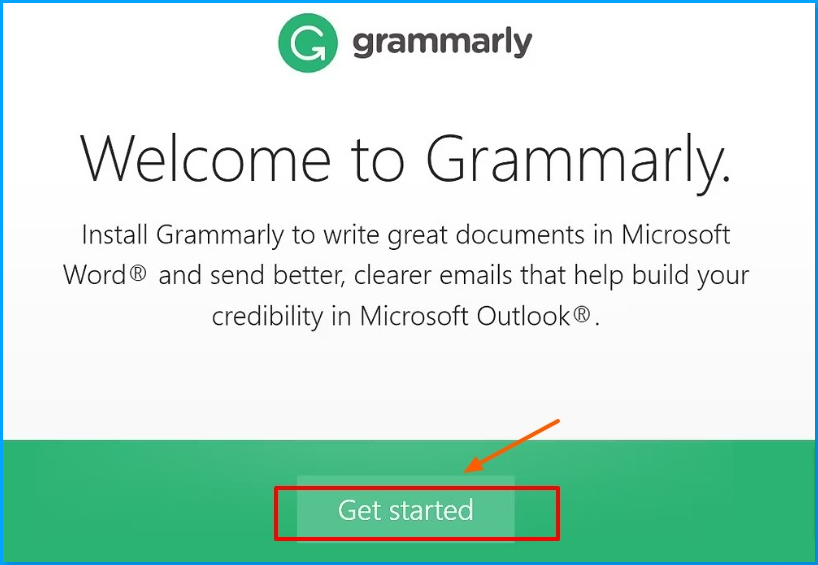
You will see a box appear on the screen. Click on “Get started” to begin the setup.
5. Enable Grammarly for Outlook:
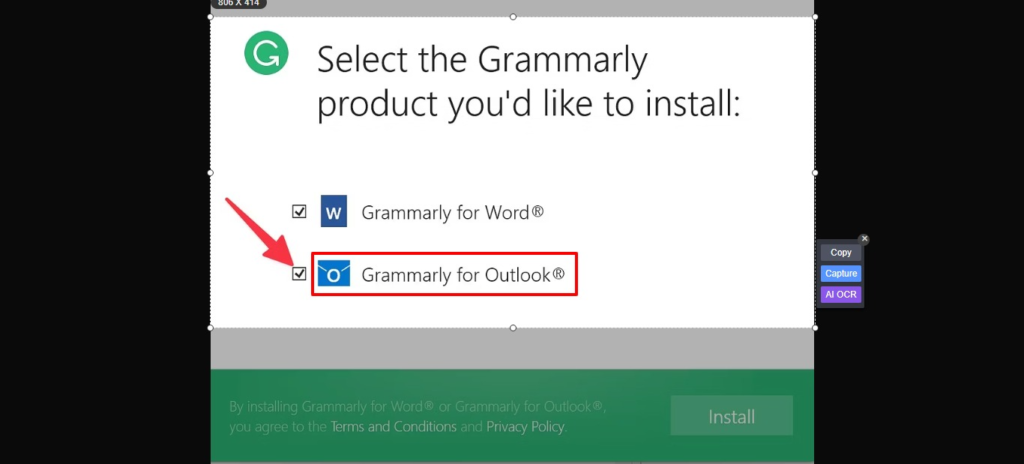
Tick the box next to “Grammarly for Outlook” and click on the “Install” button.
6. Open Outlook:
Wait for the installation process to finish and then launch Microsoft Outlook to launch on your computer.
7. Check for Grammarly:
Look for Grammarly in the top menu bar. There could be a possibility that you don’t see it at the top. Follow the next step if you don’t see Grammarly there.
8. Enable Grammarly in Outlook:
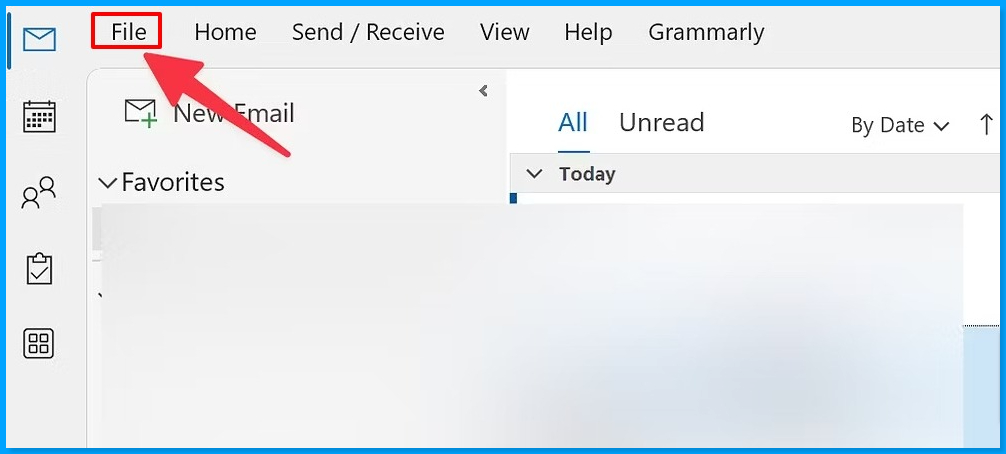
You will have to find Grammarly in the Add-ins section. For that, you will have to click on “File” in the top left corner of Outlook. Click on the “Options”. Now, you need to select the “Add-ins” option present at the left. On the right side, you will see the “Go” next to “Manage”. Select the “Go” option.
9. Select Grammarly:
There will be several options available corresponding to small boxes. Tick the box next to Grammarly and click “OK.”
10. Access Grammarly:

Now, Grammarly will appear on the Outlook page. Click on “Grammarly”. Select the three dots option at the right side of the Window, and choose “Log in.”
11. Log in to Grammarly:
Now, you have to enter the Grammarly Login credentials. After finishing the login process, you need to let Grammarly launch Outlook.
12. Write your email:
The next step is to go to the upper left corner of the Window and click on “New Email” and compose your business email.
13. Check with Grammarly:

Click “Open Grammarly” and review the suggestions given by the software so that you can improve your writing.
14. Adjust your goals:
Use “Adjust Goals” in Grammarly to make more customizable changes depending on your needs.
In this way, you can successfully install Grammarly on Microsoft Outlook.
Add Grammarly to Outlook Web
If you are familiar with Microsoft apps, then you must know that Microsoft Outlook on the web has many features like OneNote, To-Do, Skype, and Microsoft 365. I would suggest you use Outlook on the web if you want. It is possible for you to use Grammarly on Outlook web. Grammarly will help you find mistakes in your writing, like spelling and grammar.
Linux certifications had a great impact on the operating system market in today’s fast-changing technological environment and Grammarly is an amazing tool that can help you with writing.
There are many It works in web browsers like Safari, Google Chrome, Microsoft Edge, Firefox, and Opera. When you add the Grammarly tool to your browser, it can check your spelling and grammar on most websites, including Outlook.
Below are some easy steps to add Grammarly to Outlook:
1. Open Your Browser:
Firstly, you have to start by opening your preferred web browser on your computer like Google Chrome.
2. Go to Chrome Web Store:
Navigate to the search bar, and type in “Chrome Web Store”, and hit enter. You will see the Chrome Web Store now.
3. Search for Grammarly:
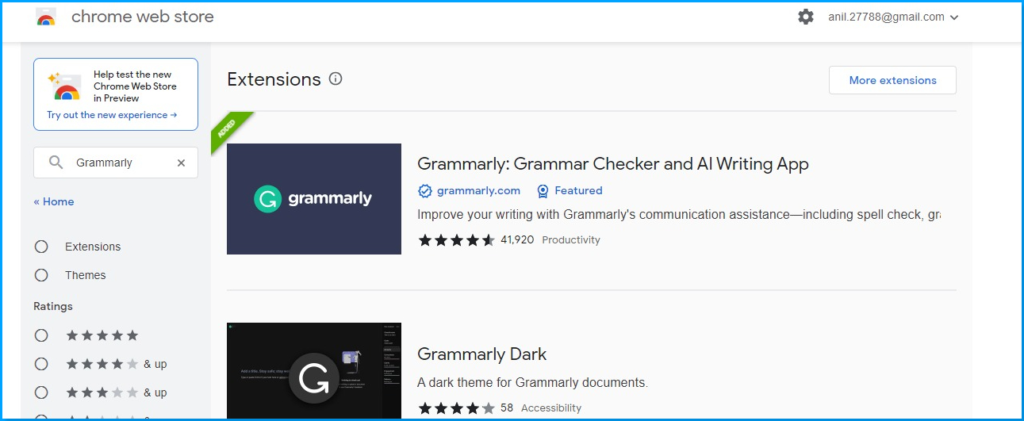
Again, navigate to the search bar in the Chrome Web Store at the top left corner, and type “Grammarly” in it, and then press enter.
4. Open Grammarly Extension Info:
Click on the Grammarly extension. After that, you will see more details for the same.
5. Add Grammarly to Chrome:
Once you’re on the Grammarly extension page, click the “Add to Chrome” button.
6. Check Grammarly Extension:
Wait for the addition of Grammarly to your web to finish up. After successful addition, you can see the Grammarly icon in the extension bar at the top of your browser.
7. Log in to Grammarly:
Click on the Grammarly icon, and log in with your Grammarly account details.
8. Open Outlook Web Version:
Go to the Outlook web version by typing “Outlook.live.com” in your browser.
9. Create a New Message:
Click on “New message” in the upper-left corner to start drafting a new email.
10. Grammarly Checks in the Background:
As you draft your email message, Grammarly will automatically run in the background to catch spelling and grammar errors.
11. Review Grammarly Suggestions:
Click on the number of Grammarly suggestions at the bottom to review. You can easily accept or dismiss changes suggested by Grammarly.
12. Enable Grammarly for Outlook.live.com (if needed):
If Grammarly isn’t working, click on the Grammarly extension icon at the top, then expand it and turn on the “Check for writing suggestions for Outlook” toggle.
In this way, you have successfully added Grammarly to Outlook web. From now on you can easily use the Grammarly web extension on your Outlook web extension.
Conclusions
Hopefully, now you know about adding Grammarly to Outlook. You can use the Grammarly plugin to easily modify the emails that you have been writing. This software will make the content of your email much better and more effective. Using Grammarly is the best way to compose the best emails on Outlook. Good luck with your professional life!
FAQs
What’s the reason my Grammarly is not working in Outlook?
Firstly, you must have properly installed and enabled Grammarly for Microsoft Office in your Outlook application. Make sure that you’re logged into your Grammarly account. If you are still facing the same issue after cross-checking everything, try reinstalling the add-in. If that does not work, then you can try Grammarly’s support for help.
Is it possible to use Grammarly with other email platforms besides Outlook?
Yes, you can use the Grammarly browser extension with various email platforms accessed via a web browser like Gmail and Yahoo Mail. Grammarly is an amazing app available everywhere including in your mobile keyboard.
Does Grammarly provide real-time checking of emails in Outlook?
Yes, Grammarly checks your emails in real-time as you compose them in Outlook. It highlights issues by underlining them in red, and you can click on these underlines to view and accept Grammarly’s suggestions. It works right away when you start working.
What are the steps to disable Grammarly in Outlook?
Follow the instructions given to disable Grammarly in Outlook, First, navigate to “File” in the top left corner. Select “Options,” and then choose “Add-ins.” From the “Manage” drop-down menu, pick “COM Add-ins,” then click “Go.” Uncheck the box next to “Grammarly Add-in,” and finally, click “OK” to disable Grammarly without uninstalling it.

Zach is an experienced and versatile writer, copywriter, and marketer with expertise in crafting effective content, using correct grammar, and optimizing for SEO.


